Tips and tricks to save time and money on building or upgrading your haunted attraction.
By Brian Foreman and Darryl Plunkie
Time and money are the two most valuable resources we haunters have, with the third important factor being location. Although we haunters may think we know a lot of time- and money-saving tips and tricks, there are new ones I hear about all the time from haunters we interview on HaunTopic Radio.
Mostly what I’m going talk about are ways to save more time and money by focusing on the right things at the right time and action steps you can do right now to start your first haunted attraction or improve your current haunt. We’ll be talking about this process in stages: idea stage, business plan, design stage, the build, set design, staffing, and marketing.
Listen to the Podcast
Key Takeaways
- Track your daily and weekly spending habits for both time and money.
- Take inventory of what you have so you don’t buy what you don’t need.
- Batch what you need to get done.
- Only do what you need to get done this season.
- To save time and money, automate, delegate, and eliminate.
- Keep all your ideas in one place.
- Develop a business plan.
- Look for budget locations.
- Design for large props and multiple scares.
- Stick to your theme, and don’t buy beyond it.
- Use actor-matronics rather than animatronics.
- Hire and train your staff early.
Watch This Session
To experience this full Master Class, become a Haunt Master member at HauntersToolbox.com
Saving Time and Money on Your Home Haunt
I spent a number of years doing home haunts. As a home haunter, you learn how to budget, because you don’t have a lot of money. You have a free attraction that’s open maybe one night a year. I’d spend a month and a half creating props in my garage, and I learned how to make them look really good. As a home haunter, you can go to thrift shops and flea markets to find stuff, which I still do. You learn a lot of creative ways to make your dollar stretch. We still use many of these same principles at Dead Factory. Saving time creates a sort of domino effect. If you can save time in one area, that often allows you to save time in others.
Saving money means budgeting, economizing, and putting money aside for the future. Track your daily and weekly spending habits for both time and money. You don’t know what you’re spending your time and money on unless you track it. By doing this, I realized how much time I was wasting on video games and Netflix, so, this past year, we carved out every Sunday to be at the haunt from March until September. During our first year, I was out there nights after work building wall panels, and I was building props in my garage to take out there.
Before you get started on anything, take inventory of what you have. For the first year of our haunt, between the stuff in my house and garage and the stuff my brother had, we pretty much didn’t have to buy anything
Batch your projects together. Don’t just do one wall panel—do 50 together. Also, whether it’s wall panels, web design, or social media, focus only on what you need to get done this season. Lastly, automate, delegate, or eliminate.
Keep All Your Ideas in One Place
Keep a notebook of all your ideas so you get them out of your head and stay focused on your theme. It’s important to keep your theme in your head at all times. When you’re building a haunt, you’re always looking for materials, so that’s in your head, too. You want to train your mind to be focused on certain things. If you have a hard time with this, get somebody on board that’s able to visualize and has the creative mind you need—because you have to be really creative to get a haunt going. Some people like doing mind mapping, and some people prefer PostIt notes. Find what works for you, and use that for your theme, your lighting, your story, your characters, and even the name of your haunt. Have a way to get all your ideas in one place and lay them out. That will help you stay on track.
As you plan, try to work at a haunted attraction. If you’re honest with them, many haunted attractions would gladly invite you in. That’s what my brother and I did. We scare acted, and I learned a lot about what to do and what not to do.
Start a haunt fund. Take on a side job or other business. Most haunt owners still have a full-time job. I do home inspections, and that’s my haunt-fund money. I also found a partner who invested capital in our haunt during its first year, and we’re still partners.
Develop a Business Plan
A business plan will save you time. Hire a consultant if needed, because that can save you time and money in the long run. There are videos about business and management in the haunted attraction arena, but a consultant can advise you on your haunt specifically. You can even hire one once you’ve got your plan in place to look it over.
Also, as part of your planning stage, register the domain name for your website, get your social media accounts, and establish your business entity. Many people do LLCs, but make sure you check to determine what kind of entity you want to be. Once you’ve got your business entity, set up your bank accounts.
Start gathering your haunt tribe now. Business cards are useful for this. Any time you’re out in public and come across someone that might want to act or be involved in your haunt in some other way, you hand them a card and tell them to call you in August or whatever.
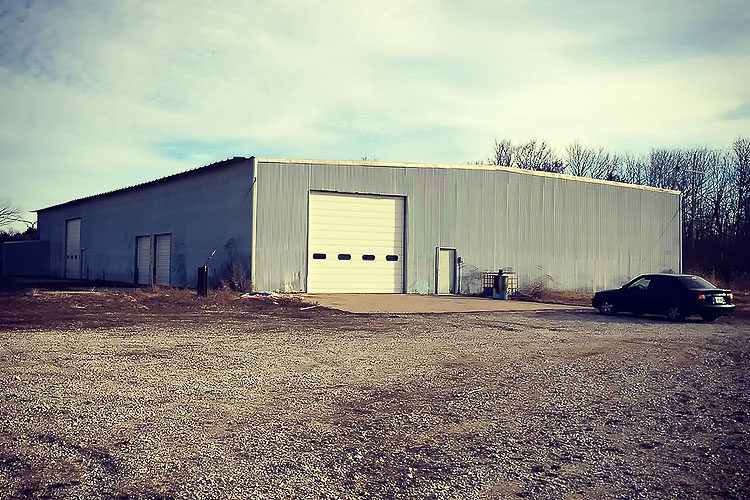
Location, Location, Location
Look for budget locations. Consider a space in a mall, because the lease may be inexpensive, and there’s plenty of parking. Speaking of parking, you could do a parking-lot haunt, or use a stadium that’s usually closed in October, like a baseball stadium. Consider teaming up with a paintball attraction or a fair. How about a mobile haunt? Decorate the trailer offsite, find a spot to set it up, pull it up with a semi, have your event, and drive it off. It’s not exactly that simple, but it’s an idea to consider.
One of the first attractions I did was Backwoods Terror in Centralia, Missouri, and I learned a lot of lessons, one of which is, make sure you adhere to code. We were rated commercial, but we were an outdoor attraction. In the third year, we were asked to put underground electrical, GFCIs, and that was going to cost $20,000, which we didn’t have, because we were a bunch of scare actors who decided to do a haunt in the woods. So, be sure you’re aware of the codes for your location.
The average attraction is 2,000 to 3,000 square feet. However, it’s probably a good idea to start small, because it will require fewer actors while being a good way to test your market.
Time- and Money-saving Ideas for Your Build
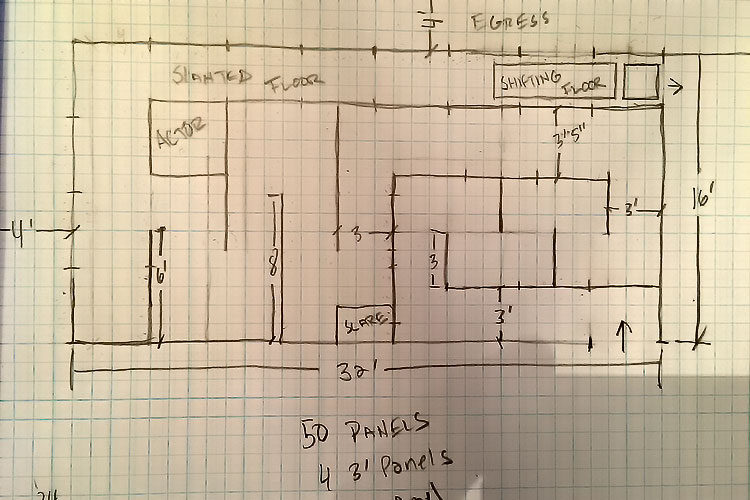
Make sure you design for large props if you have them. You don’t want to get your rooms built and realize you don’t have room for that prize animatronic that you purchased. For example, we had this 300-pound, old x-ray-machine table that we had to move down 36-inch-wide hallways. Luckily, we were able to stand it up to move it, but it was still a bitch to get through the haunt. So, create as many movable doors and open doorways as you can, and have 36-inch-wide hallways. Hallways of that width will also accommodate guests in electric wheelchairs.
Build for multiple scares, places for actors, exits, and egresses. When you’re still in the planning stage, visit other haunts to get inspiration and ideas. There’s no such thing as an original idea. Plagiarism is one thing, but you can always get ideas from other haunted attractions and twist them your own way. You can hire a haunted attraction designer to create professional blueprints, or you can use graph paper or low-cost design apps. SketchUp is a popular one.
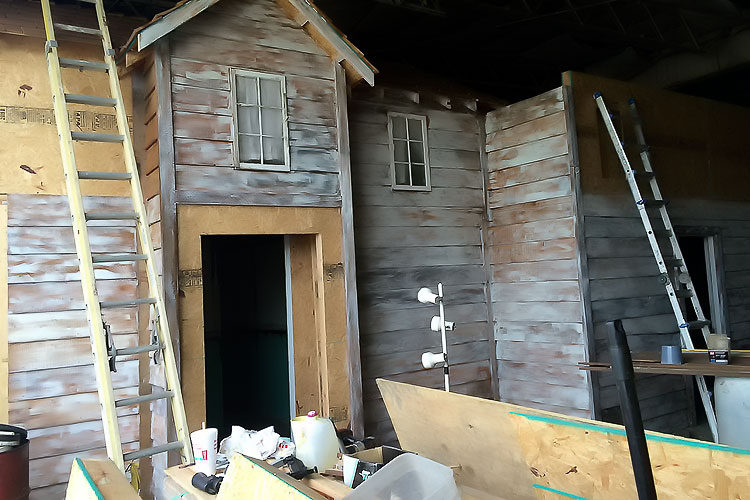
When it comes to building walls, figure out the right tools and materials, and develop a system. We built 8,000 square feet, and we were trying to save money, so we went with OSB and scrap two-by-fours—the twisted and knotty ones. I used a jig that allowed us to build one wall panel every minute after everything was cut. We had our sideboards, braces, and boards, and we had a stack of OSB right next to that jig. That jig saved us so much time.
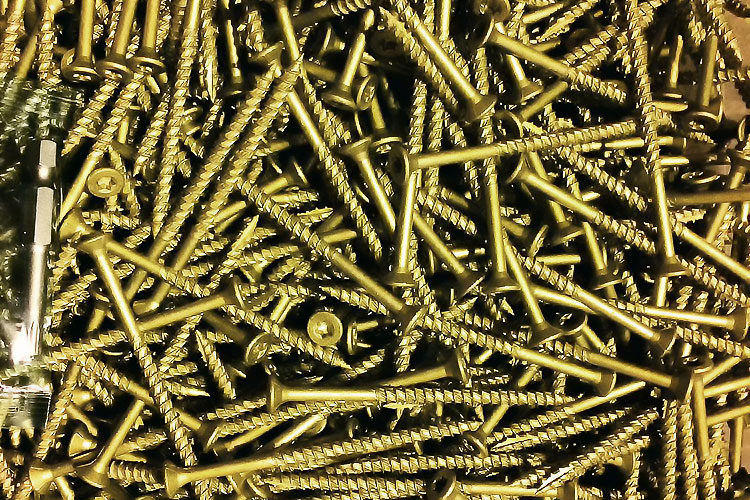
Use the torque screws. They cost a little bit more, but you should always be looking for free or cheap materials at construction sites, in a lumberyard reject pile, on curbs, in pallets, in dumpsters, or you can ask friends or get on Facebook, social media, or Craig’s list and let folks know your needs.
If you’re not a construction person, find someone who is. Build off-site and assemble in August. That gives you two months to set up if you open in October. I know some people do it in two weeks and a few do it in six days, but, especially your first year, you want to give yourself some leeway so you’re not pressured.
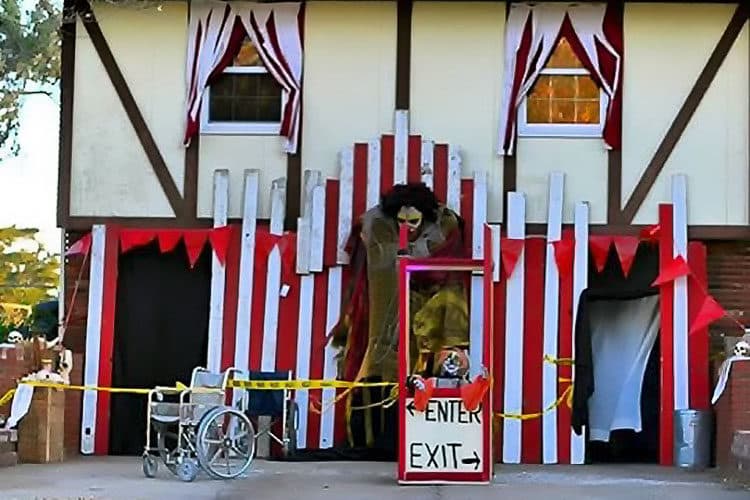
Use simple, effective scares—loud noises, air movement, scent, sound, drop panels, boo holes, and, of course, actors. For example, I have a palm sander hooked up to a motion detector in a hallway directly above guests. It hits this metal fence and makes a loud noise. Air cannons hooked up to air compressors are effective. For sound, you can buy little MP3 players on eBay for $30 and hook them up to speakers to play appropriate music or sounds in different parts of your haunt.
Detail areas only as necessary until you have the time to do it—if you need to. Decorate under show lights, because as soon as you change your lighting, other areas fade. Use garden sprayer bottles for painting. You can either use watered-down paint or you can spray water on the wall after you paint it. I recommend beginning with a light color and adding darker colors, because it’s difficult to paint over something darker with something lighter.
Stick to Your Theme, and Find Props at Auctions
Stick to your theme, and don’t buy beyond it. I see people at Transworld buying these big animatronics—dinosaurs and so on—but where are you going put that? I make a point of not buying anything at Transworld. I make a note of what I want, and then I contact the vendor later in the year, because often I don’t know in March what the theme is going to be.
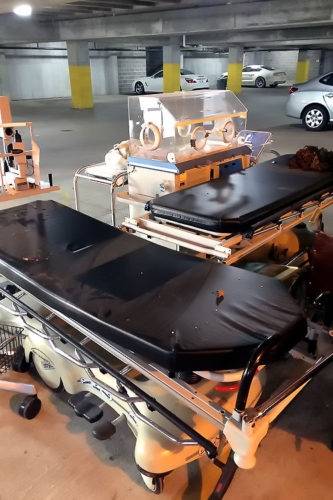
Take advantage of auctions as a source for props. When we were planning our first year, our local hospital had an auction. Only two people showed up, and one was me. I got a bunch of stretchers, an incubator, a microscope, hospital beds, and a bunch of other stuff for $25. That was the big reason I created the theme I did—Doctor Phobia—in which the first 20% of the haunt is medical-themed.
Tips for Creating Inexpensive Masks, Decorating with Lighting, and Having Actor-animated Props
So, now Darryl is going to add his thoughts on how to be creative with masks for your attraction. “You can buy a cheap mask, add some paint, add some of your own latex to create new bumps or dimples or horns or bags under the eyes or whatever. You can buy four copies of the same mask and dress them up four different ways so they fit the theme of your haunt and don’t look like an off-the-shelf item,” he said.
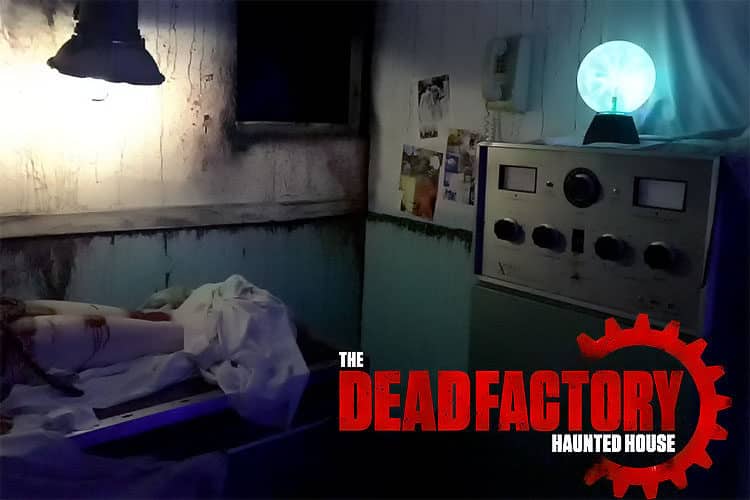
“The same is true of a prop,” Darryl continued. “You can dress it up, throw on some different clothes, and create a bigger prop. Sometimes, you can change the effect simply by altering the lighting. If you want blood stains to appear or disappear, just change the color of your lighting. Red light makes red stains disappear. Try this with props in your rooms. Shine a red light on them, shine a blue light on them, shine a yellow light on them, shine a green light on them, shine a white light on them, and see how they look under each one. In this way, you can do simple redecorating by changing the color of the light in the area.”
This reminds me of Gantom Lighting’s Color Piano, which allows you to program your lighting with your phone. You can do a heartbeat or a strobe in whatever color. These Color Pianos are something like 60 bucks per light, but they can do so much. One light will illuminate a good-sized room.
Darryl pointed out that mass-produced props and animatronics tend to break down quickly. “Instead of having an animated prop, you could have an actor in the background operating a prop like a puppet. You may have some actors that are shy or not quite ready for the limelight, so you put them behind a screen and have them operate a prop to create an actor-matronic that will be better than something you find in a Spirit store. With a person running it, the prop has much more versatility than an animatronic, which often has one repetitive action over and over,” said Darryl.
In addition, with new actors that aren’t that comfortable with dialogue, having them operate a puppet helps them work on their timing. Actors can operate hand puppets through a boo hole in a wall.
Hire and Train Your Staff Early
To save time on staffing, train and hire early. We usually start in August, and some haunts start way earlier. Experiment with your audition and training methods. Some people do formal auditions, whereas we have what we call an actor meeting to evaluate new people. We size them up and get a feel for them as they work with actors we’ve used before. Then we go inside the haunt and play around. I prefer to train them in the environment they’ll be working in rather than have them in an audition space where I ask them to show me a zombie or a crazed doctor. I put them in different scenes and see how they react in the scene. I’ve noticed that being in that environment usually makes it easier for them to get into character.
Create a schedule. There’s a haunt scheduler out there called hauntscheduleder.com, which helps you keep track of all aspects of your process and your crew. I use an old-fashioned calendar.
Darryl had another old-school suggestion. “Go to a dollar store and buy a sheet of magnets with sticky fronts. Print the names of all the people involved in your haunt, attach each name to a magnet, and, using a magnetic whiteboard, you can arrange who goes where and who has what talents and abilities. This is a really easy way to move people around. If, after the first night, it becomes clear that somebody isn’t suited to a particular role, it’s simple to move them. If you’re a visual thinker, this is a great tool.”

Focus on Reaching Your Target Market
Think about how to reach your target market. The majority of our Dead Factory audience is college kids and up, but I started marketing to an older demographic this year, and we had people that were in their sixties and seventies show up. They’d come back with their families. If you don’t know what your target market is the first year, you’ll find out soon enough.
As for what to charge your guests, a lot of people adhere to the $1 per minute rule—if you have a 20-minute walkthrough, you could charge $20. But it’s really about the value of your show.