Tips and Tricks for Using Your Creativity to Have the Most Awesome Haunt Ever… and Save Money
In this blog based on Episode 16 of my A Scott in the Dark podcast, I’m going to go back to the whole reason I started doing podcasts in the first place, which was to share ideas and basically do seminars via podcast like I was doing at various and sundry trade shows and other events.
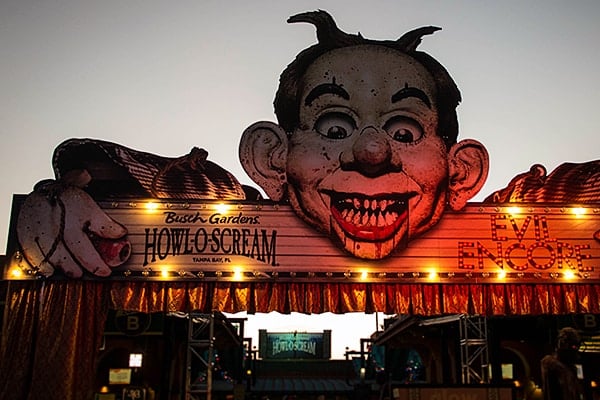
The podcast from which this blog is taken was called Make It Cheap. I’m a firm believer you don’t need a huge amount of finance to make a really cool haunted experience. When I say that, people often reply, “Yes, Scott, but you’ve worked for Busch Gardens and the Vault, you’ve always had big budgets, and blah, blah, blah.” That’s true, I have, but you’d be surprised how, even with big-budget events, some of the coolest things come from those cheap little creative ideas. Part of the reason we could do so much at Busch Gardens Howl-o-Scream, the Vault of Souls, or any of the haunt projects I’ve worked on is because we were very frugal. We tried to find creative ways to make things happen.
“Make It Good, Make It Fast, or Make It Cheap—Pick Two”
I should probably start by saying that one of my favorite phrases is, “Make it good, make it fast, or make it cheap—pick two.” You can make it good and fast, but it ain’t gonna be cheap. You can make it good and cheap, but it ain’t gonna be fast. You can make it cheap and fast, but it ain’t gonna be good. What we’re going to focus on is finding ideas and ways to make things cheap and good, because, let’s face it, we all have to think about money, whether you’re a professional haunter—where making money is a big factor—or a home haunter who wants to get as much as you can for your dollar. If you can do a full, front-yard haunt for $50, and it looks like a million, that’s what you want to do. If you’re a professional haunter who’s focusing on getting the most out of your investment, you obviously want to spend as little as you possibly and still have a high-end, quality product.
The key is to use your creativity. Here’s another phrase I use: “Creativity will provide.” If you’re creative, you’ll find a way to make your budget work. That creativity may mean you have to slightly tweak or rewrite your storyline, or it may mean you have to think a little bit outside the box, or it may mean you have to call in favors from friends, or it may mean you have to build your own props. Being cheap and still being good—sometimes even iconic—has been going on in film for years and years and years.
Tricks Used in Famous Movies
I want to share with you a couple of my favorite stories. The movie Monty Python and the Holy Grail was made on a shoestring budget and went on to earn a fortune. In certain scenes, they’re shooting up a hill, and there’s a castle in the background. The castle is just cardboard a cutout painted to look like a castle. This is hard to see, and the only reason I know about this is because I looked it up. Of course, if it’s on the Internet, it’s got to be true. The scene with the iconic coconuts and the clop-clop was originally supposed to be a big sequence with real horses, but the horses got cut from the budget. So, they came up with something creative and clever, and it became iconic.
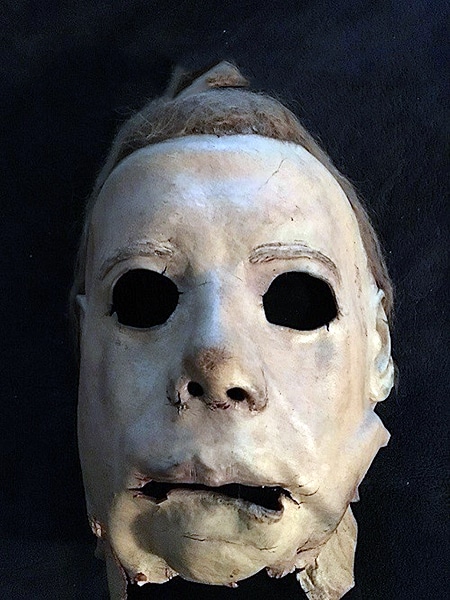
Another fun example from the horror-film genre is the Michael Meyers mask. A lot of you may know this, but I just recently found out about it, and it makes me laugh. The original Michael Meyers mask was a William Shatner-Captain Kirk mask that was painted white, so it didn’t look like Shatner. Apparently, when they went to make some of the sequels to Halloween, they found only one of the original Halloween masks, because they weren’t anticipating the first movie becoming a full franchise. They found markings on the neck of the mask that said, “Don Post” and there was a number. They contacted Don Post and read off the number. “That’s our Captain Kirk mask,” was the reply. So, it just shows you don’t have to spend a bazillion dollars to have your own private mask made. Get something that already exists for a few bucks, paint it, and it can become iconic.
Here’s another example of something that happened in a movie. In the original Star Trek movie—Star Trek: The Motion Picture—there’s a space station that’s actually a model. This is back in the day before they did everything with CGI. That exact same model is used again in Star Trek Two: The Wrath of Khan, but, in that movie, the model was repainted and flipped upside down. If you search online, you can see stills from both movies and see that yup, it’s the same model flipped upside down.
Creating Affordable Scenery—Reuse, Repaint, and Repurpose
That’s a perfect example of our first topic, or part of our first topic, which is how to do affordable scenery for your haunts. Please don’t do black Visqueen walls unless you truly think black Visqueen is exactly what the walls should be covered with. If you’re doing a slaughterhouse or something, maybe you might be able to get away with black Visqueen, but I’ve seen so many people decide to slap up black Visqueen and say, “It’s black, so it’s got to be scary.” No, it’s black, and that means you can’t see it. To me, it feels like being trapped in a giant garbage bag. I suppose there are ways to make it work, but you’ve got to be clever.
My initial advice, when it comes to scenic, is to reuse what you’ve got. One of the nice things about working at Busch Gardens back in the day was we had a full warehouse of stuff that came from earlier years of Howl-o-Scream and other shows. So, reuse stuff, and write based on what you have. If you have access to a bunch of chain-link fence, write something that takes place in a junkyard—or even a tennis court. That might seem like a really bad idea, although you know my theory—come up with a story, add the phrase, “gone horribly, horribly wrong,” and you’ve got a haunted attraction. The idea of reusing stuff is you can throw a coat of paint on something, and people won’t be able to tell what it was before. Once you’ve got the walls of your haunt, you can reposition them and move them around. If you want to learn more about this, Leonard Pickel has probably some of the cleverest ways of making things modular. I’m clearly not smart enough in that area. So, reuse, repaint, and repurpose.
We did the same thing at Howl-o-Scream as was done with the model in the two Star Trek movies—but with full-size houses. We’d take a haunted house, turn it around, and make the entrance the exit and the exit the entrance. There was a house called Trapped in the Walls. For the first two years, we ran it from one direction, and then someone said, “From an operations standpoint, Scott, it would be much easier if we ran it the other way.” Of course, as the creative guy, I dug my heels in and said, “No! It was designed to be done this way, and we can’t do it the other way.” They said, “Scott, please just walk it backwards.” Sure enough, after I walked it backwards, we turned a few props around, changed a few rooms, and made an entirely new house just by changing the way guests experienced it. That’s the ultimate in reusing what you’ve already got.
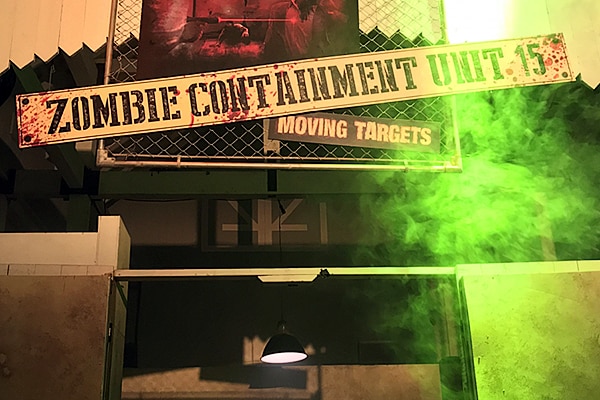
An example from Howl-o-Scream involved a zombie containment unit or ZCU. All of the Zombie Containment Unit, all of that haunted house, was pulled from the warehouse, because we had to make it fit within certain budget numbers. This is another case of write based on what you have. Write based on what you can get your hands on cheaply and easily. If Visqueen happens to be it, write a haunt where you’re using clear plastic tarps because everything takes place in a sterile environment, so it has to be wrapped in plastic. That gives it its own sort of style.
My cheap tip is to plan ahead and plan accordingly. If you have a bunch of junker cars, they make great set pieces. Sometimes you have to take the motors out and drain all the fluids, depending on whoever the fire marshal is in your area, but still, they’re big, cheap props. Write something that uses those.
Use What’s Already There
A variation on reusing is using what’s there. Write to what’s already in the space. I first learned this from John Hawkins and the guys at Oak Island when I was working at Howl-o-Scream years and years ago. We did a house called The Labyrinth of Lost Souls. There was a big power panel in the space where we were building the haunted house that wasn’t used anymore. It was gigantic, really cool looking, and very, very expensive to get out of there. So, we incorporated it into the story and actually duplicated it later in the story. The whole concept of the house was being stuck in purgatory and coming back to the same room again. We never would have had that inspiration if we hadn’t looked at what we already had, because we didn’t have to pay a dime for that first big power panel—and, we saved money by using it, because we didn’t have to tear it down and haul it away.
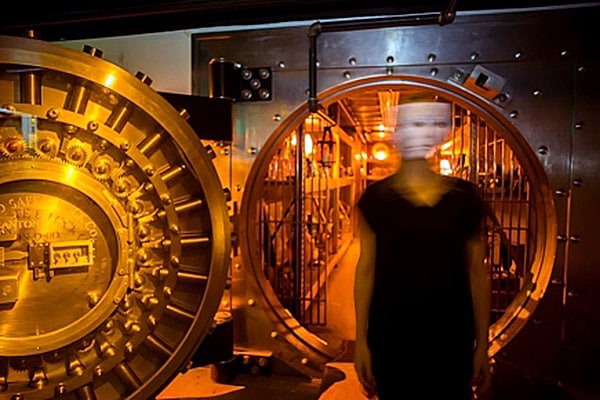
Probably the most glaring example—or the most wonderful example, depending on your perspective—of using what’s already there was in the Vault of Souls. When I wrote the Vault of Souls, one of the star rooms for the three years we did it was the actual vault itself. I never ever could have afforded—on any budget—to have built something that amazing. The door itself was 18 tons, it was very intricately done, and the vault was just a beautiful space. So, taking what you’ve got and working it into your storyline is a great way to save money.
There’s a project I’m working on right now that should be announced soon, and I’ll be able to talk about it in detail. I designed an entire house in which a loading dock is part of the space. It’s this wonderful loading dock with bare brick walls and a whole lot of metal and chain that inspired the entire writing of the piece.
Exchange Sweat Equity for Free Materials
If you’ve got local construction companies looking for help in tearing stuff down, take advantage of that. A member of my family was a rather clever carpenter, and he used to work with local construction companies to help them with renovations, because there’s always some sort of a demolition phase. He’d say, “I’ll come in and help you demo if I can take what I take down away.” He collected church pews, beautifully carved wooden doorframes, and all kinds of amazing stuff pretty much for free, because he put in the sweat equity.
You can do that on a much smaller level. If you find a local contractor in your area, you can say, “I’m looking for parts and pieces for my haunt.” This can be hardware, doorknobs, hinges, all kinds of stuff. If you’re careful, you can get some usable lumber. We’ve all done haunts that have toilets in them, so you could probably get free or very inexpensive toilets. If it’s a general contractor, you can offer to put in the sweat equity to take some of the stuff you tear down. You haul it away to your garage, warehouse, or directly to your haunt if you keep the space year-round.
To sum up this section, write your story based on what you have available—whether it’s the location or things you can tear out of other people’s buildings or things you’ve used in other haunted houses that you can turn upside down and paint a different color. This will save you a ton of money and still make everything look new and fresh.

Great Sources for Costumes
People doing haunts often think, “Costuming will be easy. We’ll just put somebody in hobo costumes and masks and call it a day.” This is probably not the best approach. Many of you have heard me say it’s important to have a costume designer. It’s important to have somebody who can be the overarching eye to see how all the costumes come together, especially if you’re doing anything in a particular period of history. Vault of Souls took place in the 1920s, so I needed clothing that looked like it was from that decade.
Instead of going out and buying all your costumes from a costume house, you’re going to be better served going out to buy clothes somewhere else. Pretty much all the costumes at Howl-o-Scream were old show costumes that we redid. The costume team would rebuild them, repurpose them, or distress them, but they were all reused stuff. Quite often we’d go to the warehouse, walk around, and write something to match the costuming we found.
If you don’t have a full costume warehouse like Busch Gardens did or access to old costume storage, go to your local thrift stores. Do this not after you’ve decided what sort of haunt you’re going to do but before you start writing. Walk up and down the aisles. There might be a ton of men’s suits or really lame prom or bridesmaids’ dresses from the 1980s. You can take a bunch of old bridesmaids’ dresses, bloody them up, and do an entire zombie prom.
Reach out to your friends. Keep an eye on Facebook. You’d be surprised how many people are willing to give stuff away just to get it out of their house. I have friends who work for a major cruise line that was clearing out their costume warehouse. A lot of it was kinda junky, but they called me and asked if I wanted to come look through it. I did, and I got a giant bolt of orange fur. I have no idea what I’m going to do with it—maybe create a giant muppet of some sort. I got some hats, some masks, and some old, tattered wigs. The cool thing about haunts is you can get the grungiest stuff, and you don’t have to distress it yourself. All you need to do is clean it. If it doesn’t look grungy enough, there are many, many inexpensive ways to grunge up costumes.

Fun with Great Stuff, Sobo Fabric Glue, and Cheese Graters
First and foremost is the haunters number-one tool, Great Stuff. You can create anything from dirt to brains to intestines depending on how you use it. Great Stuff doesn’t wash out of fabrics, ever, so the clothes don’t reek but remain nicely distressed.
If you’re trying to create something that looks like vomit, mucus, pus, or anything like that, Sobo Fabric Glue is for you. Sobo Fabric Glue dries clear with a little bit of a sheen to it, and you can add color to it. If want to make it look like vomit, you can do that. I often like to put a layer of it over blood. Put acrylic paint on something, cover it with Sobo Glue, and it looks like wet blood, wet vomit, wet mucus, or wet whatever you want it to look like. After it dries, it stays in the fabric and looks really good.
The other thing I strongly recommend people invest in when they’re going to do their own haunt costumes is junked-up cheese graters, wood rasps, or files, because you’ll use these on fabric all the time to wear out knees, rip out pockets, shred, and whatever, so it doesn’t look like that bad zig-zag cut that people do at the bottom of jeans to try to make them look like they’re worn out. Don’t do that. Take a cheese grater, bundle up the bottom of the jeans, and rub the fabric over the cheese grater until the fabric starts to shred. That way, it actually looks aged rather than cut by the mom of a fourth grader who got wrangled into doing the costumes for the school play.
I always say, “Dirty stuff up. Don’t make it look new.” If it looks like it just came out of a bag from Party City, there’s something wrong. You’ve got to add your own touches to it and grunge it up. One time, I was an actor in a student film shot in the woods in Illinois where this eccentric person had built a small castle. The scene was supposed to be a medieval broadsword fight with a demon. I was handed this clean, pressed costume, which didn’t make any sense given the scene and my character. So, I found a mud puddle near my car, threw the costume into a mud puddle, ran my car back and forth over it a few times, got it all grungy, and ripped out the hems. So, use your cheese graters and your imagination.

Clever Ideas for Cheap Masks and Manikins
People often ask me if there’s a cheap way to do masks. One idea is to take a latex mask, cut it apart, and reapply it to a nylon stocking. This gives you a completely moveable mask, similar to a silicon mask. I like taking burlap sacks or pillowcases and creating characters who feel they’re so hideously deformed they need to cover their faces. You can get old pillowcases, put drawstrings in them, cut out eyes, put some sort of mesh behind the cutouts, and then make it look like blood is seeping through the pillowcase. People’s imaginations make them think, “Oh, I’m glad he’s wearing that pillowcase over his head. I don’t really want to see what’s under there.” This is cheap and effective.
You can also get cheap, beat-up manikins. I’ve even known people who have used inflatable dolls—the kind that are normally used for more… private purposes. I’ve seen them take those, dress them, and use them as remarkably inexpensive manikins. Manikins are really expensive, and if you’re doing a traditional statue scare where there’s manikin-manikin-actor-manikin-manikin-manikin, the manikins almost always look like manikins. I strongly recommend going to your thrift store, buying some jumpsuits—or just pants, shirt, and shoes—stitching them together, filling them with old newspapers, and putting a mask over where the head would be. That mask could be one of your pillowcases. If you’ve got five people lined up with pillowcases over their heads, and one of them comes to life, it will be effective and very inexpensive. If you can afford posable manikins, great, but this is for those folks who have the time and the interest. Stitch all the clothing together, stuff it with newspaper, and pose the manikins, which will make them look more like real people. Because manikins are all built to a perfect size, stuffed clothes look fat and bunchy. You may have to sit them in a chair and maybe glue them in place, so they look like they’re sitting naturally. This is a cheap way to make manikins. If you put the same mask on the manikin that you put on the actor, your guests will never be able to tell the difference, and you’ll scare the heck out of them.
Super Cheap Makeup Ideas
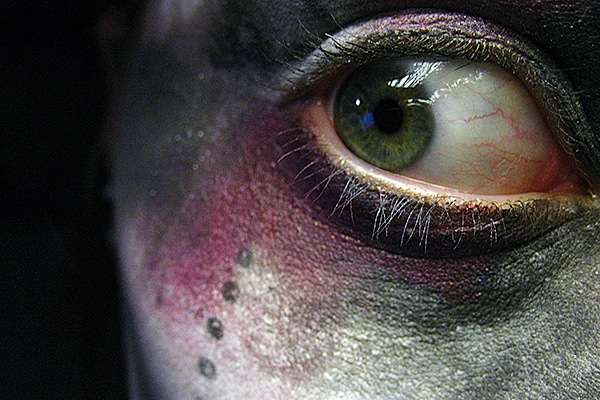
Let’s move on to some super cheap makeup ideas. One of my absolute favorite cheap makeup ideas for haunted attractions is a mud mask. I’ve done this a few times, and I just used it again for a photo shoot. I was doing a sample photo, and I needed something to change the texture of my skin. I used a mud mask that has actual mud in it. There are many that dry with a gel quality to them, which is cool for something different, but I wanted that pasty, rotting-away kinda look. I took that mud mask, put it all over my face and through my hair, and let it dry. Then I powdered it all white and drew really awful clown makeup on top of that. This is super, super cheap, and super effective.
After the mask dries, when you move your face, the mask cracks. If you want, you can fill in those cracks to make them more obvious. They might look like age lines, or they might look like you’re decomposing. You can use this for clowns, mummies, and zombies. Mud masks come in different colors—gray, green, brown, and some that dry almost white. At the end of the night, you just wash it all off. It doesn’t stick in your hair, and your face feels great. You’ve gotten a facial during the course of your day!
There’s another cool aspect to the mud mask—it sweats off during the course of the night. You can reapply it, or you can just let chips fall off, and that creates another look. If it gets kind of gunky from sweating, when you take your break or sit in front of a fan, it dries again and looks just as wonderfully gross.

When it comes to makeup, don’t skimp on brushes. Get yourself three or four really good makeup brushes and one or two really good makeup sponges. You can use crummy sponges at other times, but there’s an egg-shaped silicon sponge that’s excellent for blending and applying color. If you know what you’re doing with makeup, great, but, if you don’t, having the right tools will really help you.
As far as brushes go, get a giant, fluffy powder brush to apply powder at the end to set your makeup. My favorite brush is a two-sided brush. It has an angled tip on one side and a fine tip on the other. I like it because you can flip it around in your hand to do detail work, big block work, and blend it together with your little egg-shaped sponge. Get a contour brush, or blush brush, which is a shorter-bristled, fuller brush. With these basic brushes, you can pretty much do anything you want to. Of course, you want to take care of your brushes, clean them properly, and clean your silicone sponge properly. If you’re using crap makeup sponges, you can just throw them away. However, getting better-quality tools can be more expensive in the long run.
If you can get a good deal on a professional makeup kit, do that, but you can basically go to any drug store, Target, Walmart, or whatever, and get regular foundation makeup. If have a really pale color—a white or super light beige—a black, a brown, and a red, you can do some pretty incredible things, especially if you’re doing it over something like a mud mask, which already has all that texture. All you have to do is use your color to add a little oomph over the top.
For haunt purposes, the best lipstick is usually the cheapest. For some reason, it stays on better, and it stains better. There’s a super vibrant red—I call it “little old lady red,” which was really popular in the 1950s. Get the cheapest version of that, and you’ll have a lipstick that will stay on forever. You can dull it down with your brown foundation if you want to make it look like a scab or do some sort of blood effect with it. It will stay on your skin forever and forever. Even after you wash it off, you’ll see the stain marks on your skin. You don’t have to worry about it sweating off, and it’s cheap, which is the whole point.
I mentioned sponges, and another thing that’s fun is to get natural sponges or stipple sponges. You can lightly dab those in makeup and then plop those on your face to can give you all kinds of texture. All this stuff is cheap, cheap, cheap. You have to take a little bit of time to learn how to use it, and, as I said, creativity will provide—including for those who only have a tiny amount of money to invest.
New Uses for Common Foods
Another great tool is either spirit gum (a skin adhesive) or liquid latex. In a pinch, you can even use eyelash glue. You can just glue stuff to your face and cover it with your makeup. This creates texture, and you don’t have to invest in high-end prosthetics that you have to learn how to mold. If you’re using liquid latex, and you want to make it appear as though your brains are popping out of your forehead, you can put a layer of latex down and glue some elbow macaroni to your forehead. Then take a torn paper towel, tissue paper, or Kleenex soaked in liquid latex and put that around the macaroni so it looks like the skin is peeling away and the brains are emerging. Paint over the macaroni with latex so it all stays in place, dab it with some pink and red, and you’ve got brains coming out of your forehead.
I had a friend in college who was a theater student. He’d paint spirit gum on his lower face and dab coffee grounds onto the spirit gum to give him a five o’clock shadow. He’d do this when he was trying to get into bars and wasn’t old enough. Apparently, it worked, or they just thought, “Here’s somebody crazy enough to glue coffee to his face, so let’s let him in. He could probably use a drink.”
Another thing that’s fun to use is cornflakes or other dry cereal. Crunch it up and use that liquid latex to apply the cereal to your face. You can make it look like road rash where the skin has peeled off and you’ve got asphalt embedded in your skin. Just play with it. Take a night that you’re not doing anything, call your friends, and say, “Hey, bring something stupid I can glue to your face, and we’ll see how it works.”
When I was in college, I actually did an entire clown makeup using nothing but liquid latex and yarn. I took different-colored yarn and glued it in a spiral out from the center, so each strand of yarn was right next to the other. I created round cheeks, I put it around my mouth in three different colors, and I put it around my eyes. When you’re working with latex, it’s always good to use a blow dryer to dry the latex. Have it set on cool—otherwise, it hurts. You can get a blow dryer at pretty much any thrift store. The heating mechanism doesn’t even need to work, because you’ll never use that.
Here’s an idea I stole from drag-queens for making it look like your eyebrows have either been shaved or you never had them, which comes in really handy if you’re doing aliens or people in asylums. You can do this with eyebrow wax, but there’s no point in investing in that because you want something cheap that works really well. You can get a washable glue stick that goes on purple but dries clear. Work that into your eyebrows, and then take a tiny eyebrow brush or comb and use that to smooth your eyebrows down against your brow. Once the glue dries, they’re flat and smooth. You put foundation makeup over the top of them, and then drag queens will draw their eyebrows above where their actual eyebrows are/were. This also works for clown makeup.

Great Blood Recipes
Of course, everyone wants blood. I’m sure everyone has their own favorite blood recipe, and most blood you can create from ingredients available at a grocery store. My favorite blood recipe is dark corn syrup to which a couple of drops of red and a quarter to a half as many drops of blue food coloring—say four or five drops of red and a drop of blue. I like to use dark corn syrup because I like blood that’s darker in color—richer and browner. If you like bright red blood, you can use light corn syrup. My favorite thing to add at the end is just a little sprinkling of cocoa powder. It makes the blood taste better if you’re using it in your mouth, and it also makes it a little more opaque. It’s not as crystal-clear as the other blood you can buy.
That’s my favorite fake-blood recipe. You can make up enough to do an entire cast for maybe four or five bucks, max. Of course, you can’t buy food coloring by the drop. You have to buy it by the bottle. You may have everything you need in your kitchen, right now, to make blood. You can make a little blood capsule, pop that into your mouth, and bite down on it. That can be fun.

Finding Free Props
Now we’re going to take about props. One of the things I’ve had great luck with is using my computer to find public domain images—things like train tickets, old posters, and other things that have fallen into the public domain, which means nobody owns the rights to these, and you don’t have to pay to use them. There are entire websites dedicated to public domain images, video, literature, or music, so you can search for any of these public-domain properties. Even certain classic movies have fallen into public domain. You can put that imagery, video, or whatever on your computer, print it, and make your own props.
Which brings up another tip—invest in a printer. A lot of people don’t have printers anymore, but you need one. It doesn’t have to be a high-end printer, but it does have to be a color printer. You can print up so many wonderful props. For example, in the Vault of Souls, we had one hallway that was death certificates plastered to the wall. Those were all printed on my computer. I wrote them all, and I put the names of people I knew would be visiting on them. Instead of investing a ton of money in paint, we invested a ton of money in wallpaper paste, which we used to paste up all these printed-up death certificates. They were very cool, and personalized.
You can also do handwritten notes. If guests take them or they get destroyed, you can print 20 of them and only use one at a time. This is a great, cheap way to add unique props that tell your story.
The Importance of Investing in Hero Props
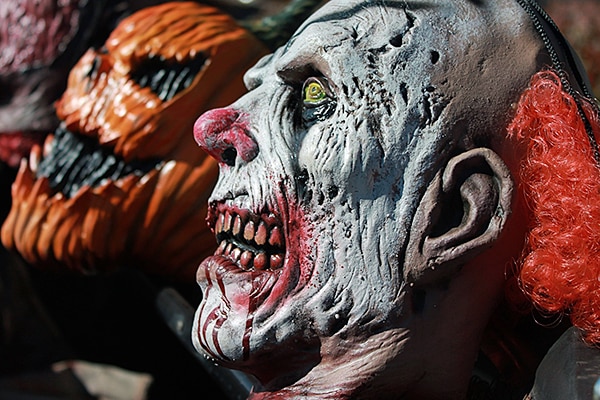
Although there are tons of ways to do things on the cheap, there are some things you shouldn’t skimp on. I’m a firm believer that you should invest in a few what I’ll call hero props, hero masks, or hero costumes. These are the things that are visible to guests for long periods of time. Most haunt actors are only seen for a few seconds, and then they disappear back into the darkness. However, for queue-line characters or characters that are seen for longer periods of time by guests, that’s where you want to spend your money. Invest in a great silicon mask for a clown that people will see for a long period of time. The next clown, which will only be seen for a few seconds, can have a mud mask, white powder, and cheap lipstick, and guests will perceive the same level of quality they just saw in the silicone mask.
So, do spend money on key pieces of scenic, costumes, and props. Find those hero items, and make sure they’re properly lit if people see them for a long period of time, because they’ll perceive everything they see to be of that same quality. The mind automatically does that.
In summary, there’s always a way to make something happen on a budget. Make it cheap, make it fast, make it good—pick two. Make sure you’ve got enough time to make it cheap and good because you’re going to be doing a lot of work. Make sure you create a plan based on what you know you can execute—in other words, write your story based on the location you’re in, what you have, and what you can get a hold of, and find ways to make those things work cohesively. If you do that, these tips will help you be a more cost-effective haunter so you can either put more money into your home haunt or put more money into your pocket if you have a professional haunt.
